- Introduction
- The Top 17 Must-Have React Development Tools for Enhanced Productivity
- React Developer Tools
- Redux DevTools
- Evergreen
- Reactide
- CopyCat
- Create React App
- React Sight
- React Cosmos
- React Proto
- Jest
- Bit
- React Query
- Wappalyzer
- ColorZilla
- Why Did You Render
- React Styleguideist
- React Hook Form
- Comparison of the React Development Tools
- Table Comparison
- Conclusion
Introduction
Developers are constantly looking for ways to improve their workflow and increase productivity. With the plethora of tools available in the market, it can take time to determine which ones are worth your time and investment. In this article, we present the top 17 must-have React dev tools that will enhance productivity and streamline workflow. Read on if you want to take your React development skills to the next level!
The Top 17 Must-Have React Development Tools for Enhanced Productivity
React Developer Tools

React Developer Tools is a browser extension for Chrome and Firefox that allows for easy debugging and profiling of React applications. With its intuitive interface, you can inspect the component tree, monitor component state, and props, and examine network requests and other performance metrics, making it easier to identify and fix issues.
Features and benefits:
- Inspect the component tree and examine the component state and props.
- Monitor network requests and performance metrics.
- Debug and profile React applications with ease.
How it enhances productivity:
React Developer Tools streamlines the debugging and profiling process, making it easier to identify and fix issues in React applications. With its powerful features, you can quickly and effectively troubleshoot problems and optimize performance, saving time and improving the overall quality of your code.
Video resource for installing and using the tool:
Example of how to best use the tool:
To get started with React Developer Tools, you’ll first need to install the browser extension. Once installed, you can access the tool by right-clicking on any page and selecting “Inspect Element”. From here, you can navigate to the “React” tab to start using the tool. You can inspect the component tree, view component state, and props, and monitor network requests and performance metrics to help identify and resolve any issues.
Code Example:
Here’s a code example of how React Developer Tools can be used to inspect component state and props:
1 2 3 4 5 6 7 8 9 10 11 12 13 14 15 16 17 | javascriptCopy codeimport React, { useState } from 'react';const ExampleComponent = () => { const [count, setCount] = useState(0); return ( <div> <p>Count: {count}</p> <button onClick={() => setCount(count + 1)}> Increment </button> </div> );};export default ExampleComponent; |
In this example, you can use React Developer Tools to inspect the component’s state and props as the count value changes when the “Increment” button is clicked.
Redux DevTools

Redux DevTools is a powerful debugging tool for React developers, which allows them to inspect the state of their Redux store and track changes made to it. With Redux DevTools, developers can see how actions are dispatched and how they affect the state of the application, making it easier to debug and optimize the performance of their React applications.
Features and Benefits:
- Time-Travel Debugging: This allows developers to see how the state of the application changes over time, so they can go back and forth in time to see what went wrong.
- State Management Visualization: Gives developers a clear view of the current state of their Redux store, so they can better understand how their data is being managed.
- Advanced Debugging Tools: Offers features like logging, filtering, and searching, which make it easier for developers to debug their applications.
How it Enhances Productivity:
Redux DevTools streamlines the debugging process by giving developers the ability to visualize the state of their Redux store and track changes made to it. This helps developers identify problems and find solutions more quickly, making them more productive and efficient.
Video Resource for learning how to use the Redux DevTools:
Example of How to Best Use the Tool:
To use Redux DevTools, first, install it as a dev dependency in your React project using npm or yarn:
1 2 | cssCopy codenpm install --save-dev redux-devtools |
Then, wrap your root Redux store with the composeWithDevTools() function from the redux-devtools-extension package, like this:
1 2 3 4 5 | javascriptCopy codeimport { createStore, compose } from 'redux'import { composeWithDevTools } from 'redux-devtools-extension'const store = createStore(reducer, composeWithDevTools()) |
Code Example:
Here is an example of how you can use Redux DevTools to log every action that is dispatched in your React application:
1 2 3 4 5 6 7 8 9 10 11 12 13 14 15 16 | javascriptCopy codeimport { createStore } from 'redux'import { composeWithDevTools } from 'redux-devtools-extension'const store = createStore(reducer, composeWithDevTools( applyMiddleware(logger)))function logger({ getState }) { return next => action => { console.log('will dispatch', action) const returnValue = next(action) console.log('state after dispatch', getState()) return returnValue }} |
Evergreen
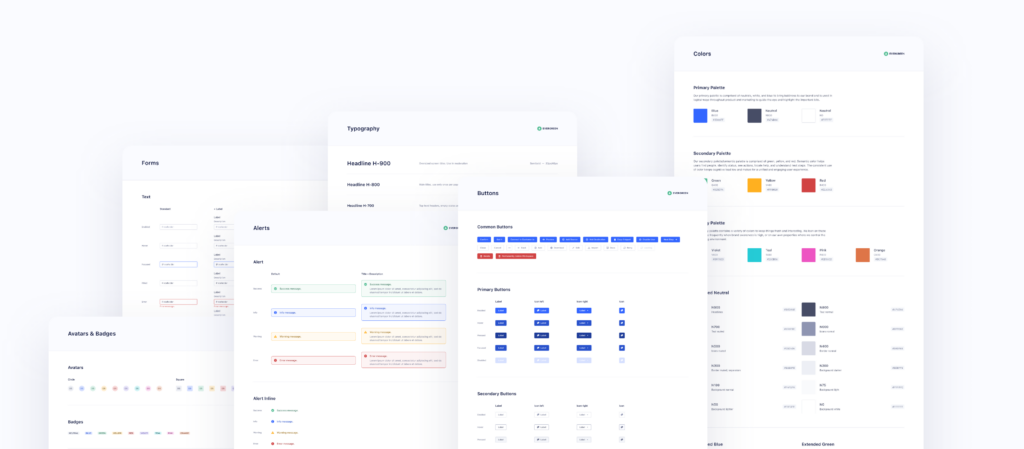
Evergreen is a UI framework for building modern and scalable web applications with React. It provides a collection of polished and well-documented components that can be easily customized to fit the specific needs of your project.
Features and benefits:
- Clean and minimal design that works well for both desktop and mobile applications
- Includes a wide range of pre-designed components, from basic UI elements to complex interactions
- Robust and well-documented API that makes it easy to create custom components
- Fast and efficient, with small file size and a focus on performance
How it enhances productivity:
Evergreen helps React developers be more productive by providing a comprehensive collection of UI components that can be used out of the box. This saves developers time and effort, as they don’t need to spend time creating custom components or finding third-party libraries to achieve their desired results. Additionally, the components are polished, well-documented, and easy to customize, which makes the development process smoother and more efficient.
Video resource for learning the tool:
Getting started with Evergreen
Example of how to best use the tool:
One of the best ways to use Evergreen is by taking advantage of its pre-designed components. For example, instead of creating a custom button component, you can use Evergreen’s Button component, which provides a clean and modern look that works well for both desktop and mobile applications. Additionally, the Button component is highly customizable, so you can easily change its style and behavior to fit your specific needs.
1 2 3 4 5 6 7 8 | javascriptCopy codeimport { Button } from 'evergreen-ui';function MyComponent() { return ( <Button>Click me</Button> );} |
Reactide
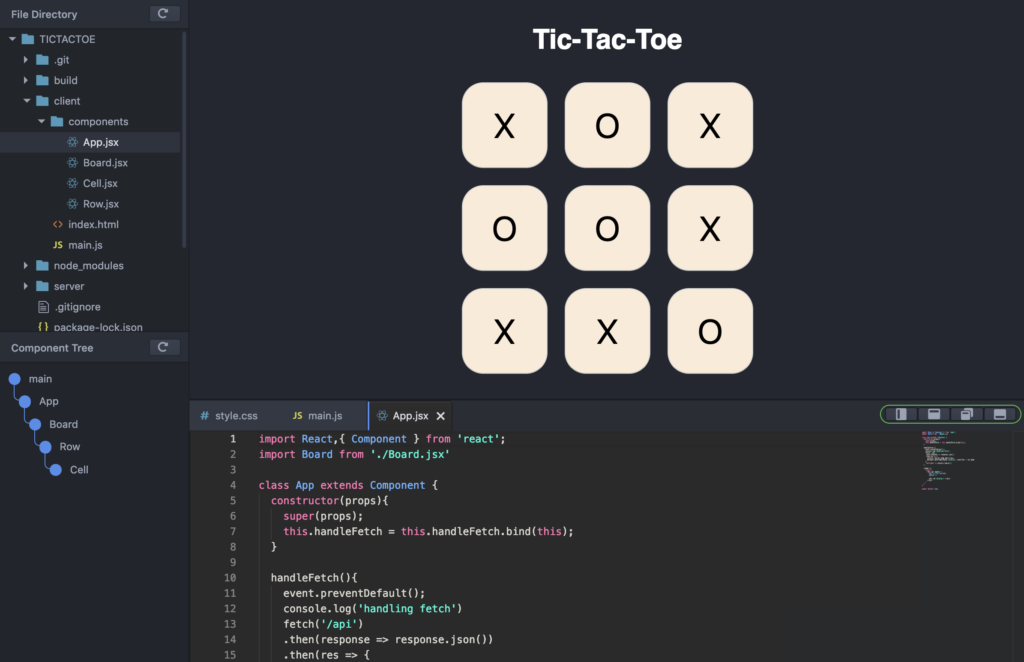
Reactide is a dedicated Integrated Development Environment (IDE) for React applications. It is designed to simplify the development process and improve the efficiency of React developers.
Features and Benefits:
- Features a powerful code editor with auto-completion, linting, and type checking
- Provides a live preview of changes made to the code
- Offers a visual representation of the component hierarchy for easy navigation
- Offers automatic debugging and testing features for improved efficiency
- Supports React, React Native, and GraphQL
How it Enhances Productivity:
- Reactide reduces the time and effort required to set up a development environment and offers a smooth development experience.
- With its visual representation of the component hierarchy, it helps developers easily navigate complex applications.
- Its live preview and debugging features reduce the time taken to identify and fix issues, leading to improved productivity.
Example of How to Best Use the Tool:
- Use the visual representation of the component hierarchy to quickly navigate complex applications.
- Take advantage of the live preview to see changes made to the code in real time.
- Use the debugging and testing features to identify and fix issues more efficiently.
Code Example:
1 2 3 4 5 6 7 8 9 10 | javascriptCopy codeimport React from 'react';const App = () => ( <div> <h1>Hello World</h1> </div>);export default App; |
In this example, we create a simple React component using Reactide’s code editor. The live preview feature allows us to see the changes made to the code in real time, making the development process smoother.
CopyCat
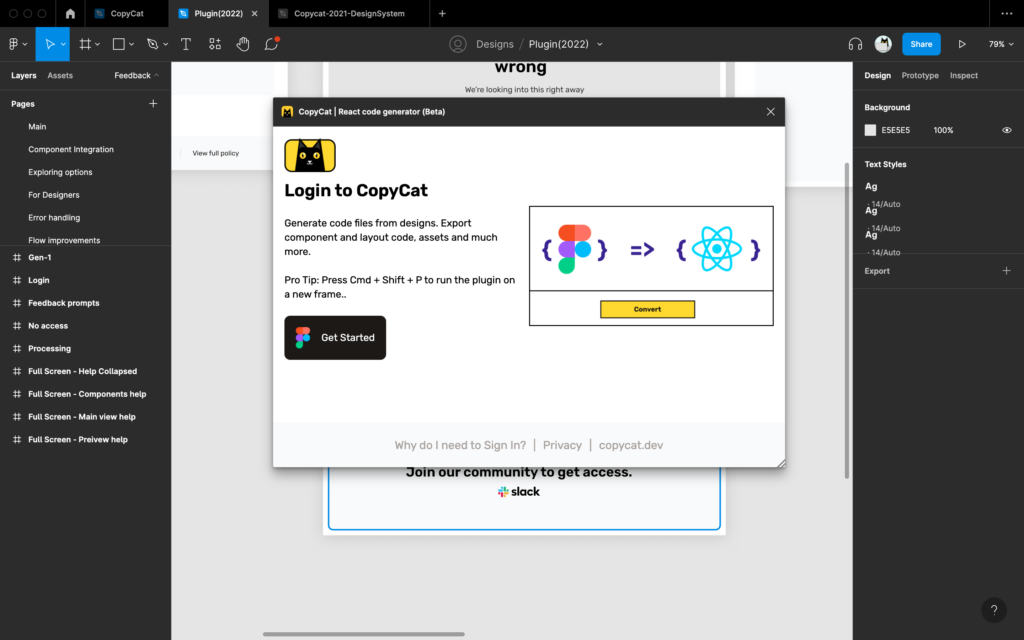
CopyCat is an AI-coding assistant to help React developers build UI superfast. By generating code from Figma designs, CopyCat helps developers save time and effort, allowing them to focus on building truly remarkable apps faster. The code generated by CopyCat is human-like and readable, making editing and customization a breeze.
Features and Benefits:
- Reduces the time and effort needed to build pixel-perfect U.I
- Export image assets and scale in the right resolution as JPEG, PNG, SVG
- Customize and control code components’ structure granularly
- Trained AI recognizes and groups similar elements
- CopyCat integrates seamlessly with popular UI libraries like MUI, Bootstrap, Tailwind, Typescript, and more
How it Enhances Productivity:
CopyCat saves developers time and effort writing redundant boilerplate, layout, and atomic code. The centralized repository makes it easier to manage components, reducing the risk of component duplication and confusion. The integration with popular design tools makes it possible for designers and developers to collaborate more effectively, streamlining the development process. Ultimately, allows developers to focus on building truly remarkable apps faster.
Video Resource for Learning the Tool:
The official CopyCat website provides a video tutorial that provides a step-by-step guide on how to use the tool. The tutorial covers the basics of creating UI components and managing them in the repository.
Example of How to Best Use the Tool:
To best use CopyCat:
- First, create a design in Figma, then connect CopyCat to your Figma account.
- Select the design you want to use and configure the settings for your project.
- CopyCat will then generate the code for you, which you can customize and integrate into your project.
- Use CopyCat’s human-like and readable code to make quick edits and customizations.
Create React App
Create React App is a popular open-source tool for building React applications. It is maintained by Facebook and provides a set of tools and configurations to help developers get started quickly and easily.
Features and Benefits:
- Zero Configuration: Create React App requires no setup or configuration, allowing developers to get started quickly and easily.
- Automated Builds: Create React App automatically sets up a build pipeline, including features like hot-reloading and code splitting, to improve the development experience.
- Cross-platform: Create React App works on Windows, Mac, and Linux, making it accessible to developers on any platform.
- Easy Deployment: Create React App makes it simple to deploy a React application to various platforms, including Heroku, AWS, and GitHub Pages.
- Modern JavaScript and CSS: Create React App uses the latest JavaScript and CSS features, including ES6 and CSS Modules, to provide a modern development environment.
How it Enhances Productivity:
Create React App helps developers get started quickly and easily, reducing the time and effort required to set up a new project. It also automates many repetitive and time-consuming tasks in building a React application, freeing developers to focus on writing code and building features.
Video Resource for Learning the Tool:
Example of How to Best Use the Tool:
- To get started with Create React App, simply run the following command in your terminal:
1 2 3 4 | perlCopy codenpx create-react-app my-appcd my-appnpm start |
This will create a new Create React App project, install all the required dependencies, and start a development server. From there, you can start building your React application, using the tools and configurations provided by Create React App.
React Sight
React Sight is a real-time visualizer for React applications. It is a browser extension that provides a visual representation of the components and state of a React application, allowing developers to easily understand and debug their code.
Features and benefits:
- Real-time visualization of the components and state of a React application
- Easy to understand and navigate the component hierarchy and state changes
- Supports multiple React frameworks, including React, React Native, and Next.js
- Works with both client-side and server-side rendering
How it enhances productivity:
React Sight helps developers quickly understand the structure and behavior of their React applications, reducing the time and effort needed to debug and optimize their code. With a visual representation of the components and state, developers can easily identify and fix issues, leading to faster development and improved application performance.
Example of how to best use the tool:
React Sight is best used in conjunction with the development process. As developers build and test their applications, they can use React Sight to see the real-time changes in the component hierarchy and state. This allows them to identify and fix issues quickly, leading to faster development and improved application performance.
React Cosmos

React Cosmos is a tool for building and testing reusable UI components in React applications. It provides a comprehensive solution for managing the development of components, making it easier for developers to build, test, and maintain their code.
Features and Benefits:
- React Cosmos offers a development environment for building and testing UI components in isolation.
- It provides a live preview of components, making it easy to see changes to components in real time.
- The tool supports hot reloading, so developers can make changes to components without having to refresh the page.
- React Cosmos also provides a flexible and scalable architecture for building and testing components, making it ideal for large-scale projects.
How it Enhances Productivity:
React Cosmos helps developers to work more efficiently by providing a streamlined workflow for building and testing components. It eliminates the need to switch between different tools and environments, saving time and reducing the risk of errors. The live preview and hot reloading features also help to speed up the development process, making it easier to make changes to components and see the results.
Video Resource for Learning the Tool:
Example of How to Best Use the Tool:
React Cosmos is best used with a code editor, such as Visual Studio Code or Atom, to build and test components. The tool provides a range of configuration options, allowing developers to customize the environment to meet their specific needs. To get started with React Cosmos, developers can create a new project and import the components they want to test and develop. The tool provides a range of features and tools for managing the development of components, making it an ideal choice for building and testing reusable UI components in React applications.
React Proto
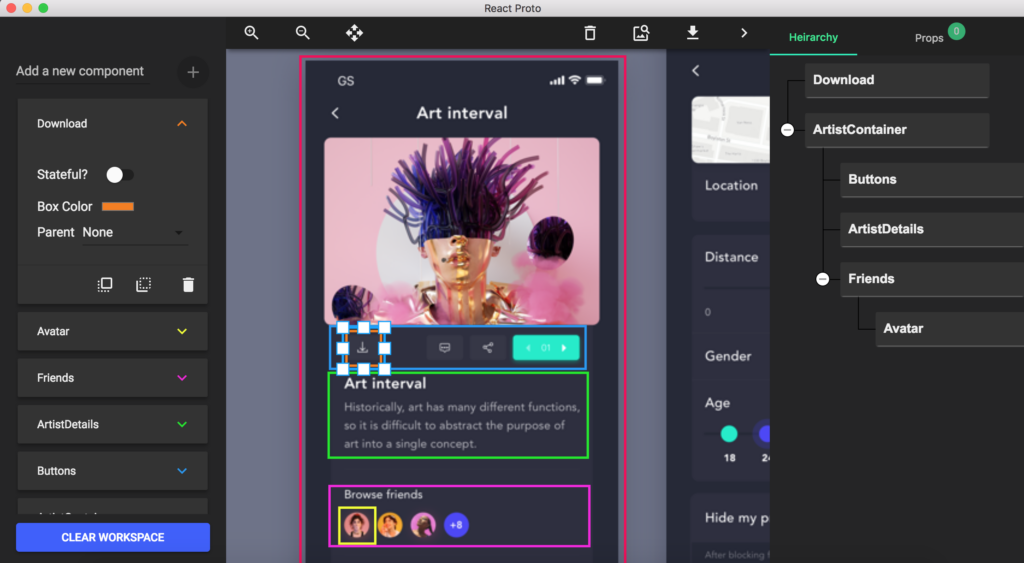
React Proto is a tool for building high-fidelity prototypes of React applications.
Features and benefits:
- React Proto allows for creating prototypes that are close to the final product, with real data and interactions.
- The tool provides a user-friendly interface for designing and previewing prototypes, making it accessible to designers and developers alike.
- React Proto integrates with Sketch, Figma, and Adobe XD, allowing for seamless design import and export.
- The prototypes created with React Proto are interactive, allowing for testing and user feedback.
How it enhances productivity:
- React Proto helps to speed up the prototyping process, reducing the time spent on manual coding and design adjustments.
- The tool allows for rapid iteration and testing, leading to better and faster decision-making.
- React Proto helps to bridge the gap between design and development, facilitating collaboration between teams.
Example of how to best use the tool:
- React Proto is best used for creating high-fidelity prototypes of React applications, allowing for testing and user feedback before committing to development.
- The tool can be used to create prototypes for a variety of applications, from web applications to mobile apps.
- React Proto is especially useful for designers and developers working together, as it facilitates collaboration and helps to bridge the gap between design and development.
Jest

Jest is a popular JavaScript testing library. It is a complete and easy-to-set-up JavaScript testing solution that works with projects built using React, Angular, Vue, and other popular frameworks.
Features and benefits:
- Jest is a fast and efficient testing library that can handle complex testing scenarios with ease.
- Jest provides an intuitive and simple API for writing tests.
- Jest has a large community of users who contribute to its development and maintenance, making it a reliable and well-supported tool.
- Jest has a feature-rich CLI that provides features such as test coverage, watch mode, and parallel testing.
- Jest also provides a snapshot testing feature, which allows you to capture the state of your components and test them against changes.
How it enhances productivity:
- Jest makes it easy to write and run tests for your code, ensuring that your code is working as expected.
- Jest helps you catch bugs and issues early in the development cycle, which saves you time and effort in fixing them later.
- Jest’s fast and efficient testing process helps you get feedback on your code faster, allowing you to iterate and improve your code more quickly.
- Jest’s snapshot testing feature makes it easy to test your components and ensure they are working as expected over time.
Video resource for learning the tool:
Crash course of Jest:
Example of how to best use the tool:
- Jest is best used for unit testing. You can write tests for your components, functions, and other parts of your code to ensure they are working as expected.
- Jest is also great for integration testing, where you can test multiple parts of your code together to ensure they are working together correctly.
Note: The code example for Jest can vary greatly depending on the specific use case, but a basic example of testing a simple function with Jest might look like this:
1 2 3 4 5 6 7 8 9 10 11 12 | javascriptCopy code// sum.jsexport default function sum(a, b) { return a + b;}// sum.test.jsimport sum from './sum';test('adds 1 + 2 to equal 3', () => { expect(sum(1, 2)).toBe(3);}); |
Bit
Bit is a powerful tool for managing and sharing reusable components in React applications. It helps developers to build, test, and publish components in an efficient and organized manner. Here is a detailed explanation of Bit, its features and benefits, and how it enhances productivity:
Features and Benefits:
- Bit allows developers to isolate components into individual, self-contained units that can be easily shared and reused across projects.
- With Bit, developers can collaborate on components, test them in isolation, and publish them to a shared repository for others to use.
- Bit provides a visual interface for browsing and exploring components, making it easier to find and reuse existing components.
How it Enhances Productivity:
- Bit eliminates the need to copy and paste code between projects, saving time and reducing the risk of bugs.
- By testing components in isolation, Bit helps developers to catch bugs early and avoid regressions in the future.
- Bit makes it easier for teams to share and reuse components, leading to a more modular and maintainable codebase.
Example of How to Best Use the Tool:
- Bit is best used for managing and sharing components in a React application. For example, a team of developers can create and publish a reusable button component that can be easily imported and used in other projects.
- Bit also makes it easy to version components and track changes over time, making it a great tool for managing component libraries.
React Query

React Query is a popular, lightweight library for managing and caching asynchronous data in React applications. It is designed to simplify the process of fetching, storing, and updating data in a React app, while also providing a simple API for handling errors and optimizing performance.
Features and benefits:
- Simple API for fetching and updating data
- Automatic caching and re-fetching of data
- Ability to pause and resume data updates based on component state
- Support for optimistic updates and error handling
- Lightweight and highly performant
How it enhances productivity:
React Query makes it easier for developers to manage and cache data in their React applications, reducing the amount of code they need to write and improving the performance of their apps. It also provides a simple and intuitive API for handling errors and optimizing data updates, which can save time and reduce frustration for developers.
Video resource for learning the tool:
The React Query official website (https://react-query.tanstack.com/) provides a comprehensive video tutorial series on how to use the library, as well as written documentation and examples.
Example of how to best use the tool:
One of the best ways to use React Query is to fetch data in your React components, and then store and update that data as needed. For example, you might use React Query to fetch data from a REST API, and then cache that data locally so that it can be quickly retrieved and displayed to the user. You can also use React Query to manage the loading state of your data, and to handle errors and optimistically update data as needed.
Wappalyzer

Wappalyzer is a tool that helps developers and webmasters identify the technologies used on websites. It is a browser extension that provides insights into the underlying technology stack of a website, including content management systems, e-commerce platforms, web frameworks, server software, and more.
Features and Benefits:
- Identifies technologies used on websites
- Provides insights into the underlying technology stack of a website
- Easy to use browser extension
- Supports multiple browsers including Chrome, Firefox, and Safari
- Free and open-source
How it Enhances Productivity:
Wappalyzer can help developers and webmasters save time and effort in identifying the technology used on websites. Instead of manually researching and testing, Wappalyzer provides quick and accurate information on the technology stack, allowing developers to make informed decisions and work more efficiently.
Video Resource for Learning the Tool:
Wappalyzer provides a demo video on their website (https://www.wappalyzer.com/demo) that showcases the tool’s features and how to use it.
Example of How to Best Use the Tool:
Wappalyzer can be best used by developers and webmasters who are looking to identify the technology used on a website. This information can be used for research purposes, for competitive analysis, or for planning and developing websites. To use Wappalyzer, simply install the browser extension and visit the website you want to analyze. The tool will automatically display the technologies used on the website.
ColorZilla

ColorZilla is a browser extension that helps web developers and designers to easily get the color codes from web pages, color picker and eyedropper. It is available for Chrome, Firefox, and Safari.
Features and Benefits:
- Advanced Color Picker: ColorZilla’s color picker provides a simple and intuitive way to select colors from web pages and get the color code in multiple formats.
- Eyedropper: The eyedropper tool allows you to pick colors from anywhere on the screen, making it easy to match colors from other sources.
- Gradient Generator: ColorZilla’s gradient generator helps you to create smooth color gradients for your designs.
- Webpage Color Analysis: ColorZilla provides a comprehensive analysis of the colors used on a web page, including the most used colors and a palette of complementary colors.
How it Enhances Productivity:
ColorZilla saves time and effort for web developers and designers by providing a simple and efficient way to get color codes from web pages. The advanced color picker and gradient generator make it easy to create color palettes, while the webpage color analysis provides valuable insights into the color usage of a website.
Video Resource for Learning the Tool:
ColorZilla has a video tutorial available on their website that demonstrates the features and benefits of the tool.
Example of How to Best Use the Tool:
One of the best ways to use ColorZilla is to analyze the color usage of websites that you admire. This can give you ideas for your own projects and help you to create color palettes that are consistent with the look and feel of your website.
Why Did You Render

Why Did You Render (WDR) is a performance optimization tool for React applications, which helps developers identify and fix issues related to re-rendering of components. The tool can be easily integrated into any React project and provides detailed information on why a component is re-rendering, helping developers to optimize their code and improve the overall performance of their applications.
Features and Benefits:
- Component re-rendering analysis: WDR provides detailed information on why a component is re-rendering, helping developers to optimize their code and improve the performance of their applications.
- Customizable tracking: WDR allows developers to track specific components and their render behavior, making it easier to focus on specific areas of the application that need optimization.
- Easy integration: WDR can be easily integrated into any React project, making it accessible to developers of all skill levels.
- Performance optimization: By identifying and fixing issues related to re-rendering of components, WDR helps developers to optimize the performance of their React applications.
How it Enhances Productivity:
WDR helps developers to identify and fix performance issues related to re-rendering of components, which can significantly improve the performance of their React applications. By providing detailed information on why a component is re-rendering, WDR helps developers to optimize their code and make their applications faster and more efficient.
Example of How to Best Use the Tool:
WDR is best used in combination with other performance optimization tools and techniques, such as code profiling and performance monitoring. To get the most out of WDR, developers should integrate it into their React projects and use it to track the render behavior of specific components.
Code Example:
Here is a simple example of how to use WDR in a React project:
1 2 3 4 5 6 7 8 9 | javascriptCopy codeimport React from 'react';import { whyDidYouRender } from '@welldone-software/why-did-you-render';if (process.env.NODE_ENV !== 'production') { whyDidYouRender(React, { trackAllPureComponents: true });} |
In this example, WDR is integrated into the React project and set to track all pure components. The tool will provide detailed information on why any component is re-rendering, helping developers to optimize their code and improve the performance of their applications.
React Styleguideist
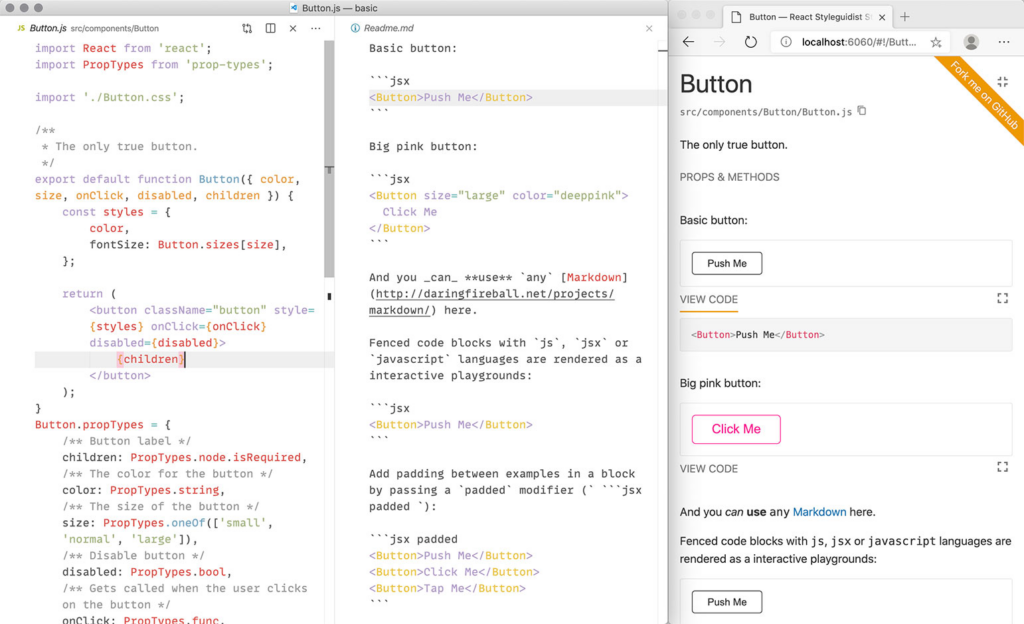
React Styleguideist is a tool for creating and maintaining a style guide for your React projects. It provides a way to document and enforce your design system, ensuring that all components are consistent and meet your design standards.
Features and Benefits:
- Automatically generates a style guide from your React components
- Supports custom styles, themes, and branding
- Includes interactive examples and documentation for each component
- Easy to integrate with your existing build process
How it Enhances Productivity:
React Styleguideist saves time and effort by automating the process of creating and maintaining a style guide. It eliminates the need to manually document and update your design system, freeing up time for more important tasks. Additionally, the tool helps to ensure that all components are consistent and meet your design standards, reducing the risk of design inconsistencies and improving the overall quality of your project.
Video Resource for Learning the Tool:
A great video on how to use React Styleguidist the wrong way:
Example of How to Best Use the Tool:
React Styleguideist is best used in a project where design consistency and documentation are important. For example, if you are working on a large-scale project with multiple developers, using React Styleguideist can help to ensure that all components are consistent and meet your design standards.
Code Example:
Here is a simple example of how to use React Styleguideist in a React project:
1 2 3 4 5 6 7 8 9 10 11 12 13 14 15 16 17 18 19 20 21 22 23 24 25 26 | javascriptCopy codeimport React from "react";import { Styleguide, StyleguideProvider } from "react-styleguideist";import "./index.css";const components = [ { name: "Button", component: Button, props: { children: "Click me!", onClick: () => alert("Button clicked!"), }, },];function App() { return ( <StyleguideProvider> <Styleguide components={components} /> </StyleguideProvider> );}export default App; |
React Hook Form
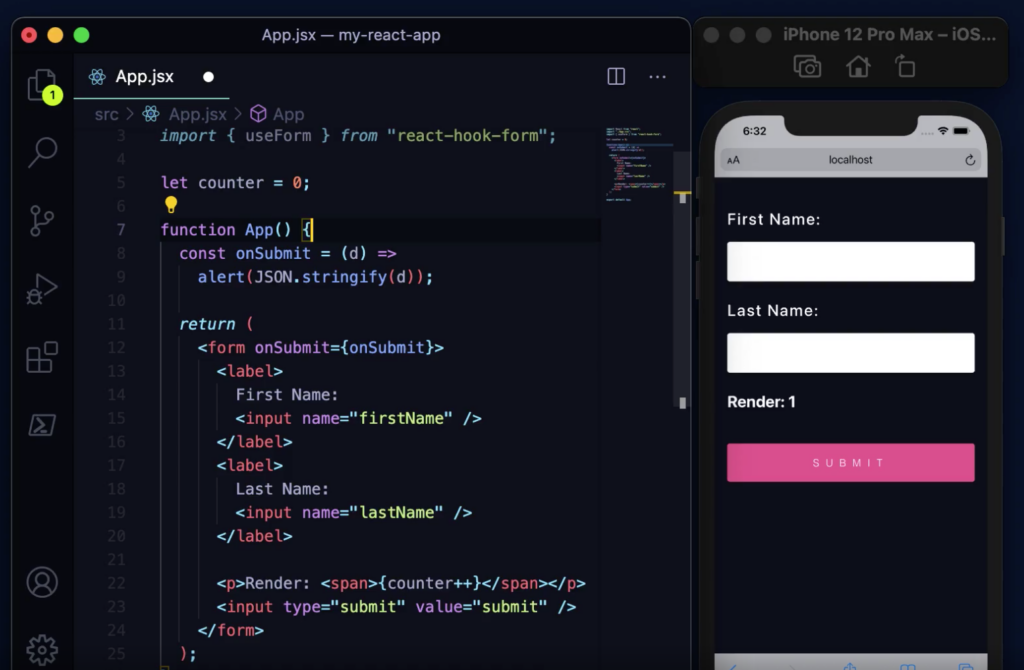
React Hook Form is a popular library for managing form state in React applications. The library provides a set of hooks and utilities that simplify the process of handling forms and form validation.
Features and benefits:
- React Hook Form provides a straightforward API for creating and managing forms in React applications.
- The library uses hooks to manage form state, which makes it easy to integrate with other hooks and libraries.
- React Hook Form provides a simple and flexible system for validating form inputs, with support for both built-in and custom validation rules.
- The library is lightweight and fast, making it ideal for use in production environments.
How it enhances productivity:
React Hook Form makes it easier to manage forms in React applications, which can save developers time and effort. By providing a simple and flexible API, the library helps developers to focus on building features, rather than managing complex form state and validation logic.
Video resource for learning the tool:
Full tutorial:
Example of how to best use the tool:
React Hook Form is best used in conjunction with React components and hooks, to create and manage forms in a React application. To get started, you can install the library using npm or yarn, and then import the hooks and components into your React code. From there, you can use the useController hook to create a form controller, and the useForm hook to manage form state. You can then use the register and handleSubmit functions to add form inputs and submit the form. You can learn to unlock the secret power of hook form here.
Code example:
Here’s a simple example of how to use React Hook Form to create a form in a React component:
1 2 3 4 5 6 7 8 9 10 11 12 13 14 15 16 17 18 | javascriptCopy codeimport { useController, useForm } from 'react-hook-form'const MyForm = () => { const { handleSubmit, register, errors } = useForm() const onSubmit = data => { console.log(data) } return ( <form onSubmit={handleSubmit(onSubmit)}> <input name="email" ref={register({ required: true })} /> {errors.email && <p>This field is required</p>} <button type="submit">Submit</button> </form> )} |
Comparison of the React Development Tools
All the 17 React development tools have the goal of enhancing the productivity of React developers. However, they each have their own unique features and benefits and cater to different aspects of React development.
Table Comparison
| Tool | Purpose | Key Features | Pros | Cons |
|---|---|---|---|---|
| React Developer Tools | Inspect and debug React applications | Live editing, component hierarchy, state, and props inspection | Free, widely adopted, easy to use | Limited to browser-based React applications |
| Redux DevTools | Debug and inspect Redux-based applications | Time-travel debugging, state inspection, actions, and state history | Free, widely adopted, integrates with React Developer Tools | Limited to browser-based Redux-based applications |
| Evergreen | UI library for creating consistent and polished interfaces | Pre-designed components, easy customization, accessible | Consistent design, fast development time, accessible | Limited scope, may not cater to specific design requirements |
| Reactide | Standalone IDE for React development | Complete workflow, live error checking, real-time preview | One-stop-shop for React development, real-time error checking | May have a steeper learning curve compared to other tools |
| CopyCat | Generate code from Figma designs | Customize code components, integrates with many UI libraries, easy asset import, instant code generation | Easy to use, consistent design, faster development time, code reuse | May not be suitable for complex component generation |
| Create React App | Scaffold a React project | CLI tool, zero-configuration setup, optimized build setup | Easy to get started, saves time on setup, optimized build performance | Limited customization options, may not fit complex requirements |
| React Sight | Visualize React components | Dynamic component tree visualization, real-time updates, performance tracking | Improves understanding of complex component structures, helps identify performance issues | Limited to React projects, may not support all features of React |
| React Cosmos | Test and develop React components in isolation | Component-based testing, isolated environment, modular development | Improves component development, reduces testing time, facilitates collaboration | Limited to React projects, may require additional setup |
| React Proto | Prototype React components | Drag-and-drop interface, real-time updates, reusable components | Quickly create prototypes, saves time on manual coding, facilitates collaboration | Limited to prototyping, may not be suitable for production use |
| Jest | JavaScript testing framework | Snapshot testing, coverage reporting, parallel testing | Easy to use, fast, comprehensive testing solution | Steep learning curve for new users, may require additional setup for complex projects |
| Bit | Share and reuse code components | Component hub, version management, collaboration tools | Improves code reuse, facilitates collaboration, reduces duplication | Limited to JavaScript projects, may require additional setup for complex projects |
| React Query | Manage and cache data in React | Real-time updates, automatic refetching, performance optimization | Improves data management, reduces time spent on manual updates, improves performance | Limited to React projects, may not support all use cases |
| React Hook Form | Form handling in React | Controlled components, form validation, performance optimization | Improves form handling, reduces time spent on manual updates, improves performance | Limited to React projects, may have limited customization options |
| Wappalyzer | Web technology analysis tool | Website analysis, technology identification, market trends | Improves understanding of website technologies, facilitates market research, improves decision making | Limited to website analysis, may not support all technologies |
| ColorZilla | Color picker and gradient generator | Color picker, gradient generator, eye-dropper tool | Improves color selection, saves time on manual color coding, facilitates design work | Limited to color selection, may not be suitable for complex design tasks |
| React Styleguidist | Style guide generation for React | Live component examples, custom documentation, automatic code highlighting | Improves documentation, reduces time spent on manual coding, facilitates collaboration | Limited to React projects, may require additional setup |
| Why Did You Render | Debugging tool for React | Detailed component updates, performance tracking, custom updates | Improves debugging, reduces time spent on manual updates, improves performance | Limited to React projects, may have limited customization options |
Conclusion
In conclusion, React developers are constantly looking for tools to enhance their productivity and make their lives easier. Each tool has its unique features, benefits, and drawbacks. Some tools, like Create React App and React Query, focus on simplifying the setup and management of a React project, while others, like Jest and Bit, concentrate on testing and component management. Tools like React Hook Form and React Styleguidist help with form handling and style management, respectively. Wappalyzer and ColorZilla are helpful for web development and design, while React Sight and React Proto offer visualization and prototyping capabilities. Ultimately, the choice of React dev tool will depend on the project’s specific needs and the developer’s preferences. It is essential to carefully consider each tool’s features and benefits before choosing the one that best suits the project requirements.
Interesting Reads from Our Blog:
- Streamlining Your React Development Workflow with Task Automation
- 10 Secrets to React Speed: Quickly Optimize Your React Apps
- Why Mastering Coding Fundamentals Are More Valuable than Expertise in One Language
- A Beginner’s Guide to Maintaining React Applications
- Unlock the Power of Javascript Async Operations


