- Introduction to Fetching Data from API
- What is a REST API: Fetching data from API
- Advantages of RESTFul APIs: Fetching data from API
- Fetching data from API in React SPA
- Prerequisites to setup your CRA
- How to use the Fetch API to fetch data in React
- How to use custom React hook (
useFetch) to fetch data - Steps to use the
react-fetch-hooklibrary - How to use Axios to fetch data from API
- Steps to use use Axios to fetch data from API
- How to use the React Query to fetch data from API
- Steps to use React Query to fetch data from API
- Conclusion
- Videos on Fetching Data from API and Examples
- Further readings

Introduction to Fetching Data from API
Often times, in fullstack web applications, you are required to either interact with a database; this can be a relational or non-relational database, or interact with an API. In such scenarios, you will need to send or request data through some network. Fetch allows you to send or get data across networks. As a React developer, you should be able to comfortably consume APIs in your React applications in order to build a full-fledged React application.
What is a REST API: Fetching data from API
A REST API is an API (Application Programming Interface) which allows two software programs to communicate with each other. An API outlines the proper way for a developer to write a program requesting services from an operating system or other application.
REST stands for “Representational State Transfer” and it refers to an architectural style and approach to communication used in web services. REST APIs follow a structure known as the REST Structure for APIs. This consists of various rules that developers must follow when creating APIs.
Advantages of RESTFul APIs: Fetching data from API
The RESTful API architecture is advantageous over other similar technologies such as SOAP (Simple Object Access Protocol) because REST uses less bandwidth, making it more suitable for efficient internet usage. REST API is universal to language or platform as such, it can be consumed with any language or ran on any platform. RESTful APIs can also be built with programming languages such as JavaScript or Python.
Fetching data from API in React SPA
There are several methods to use REST APIs in a React application. These methods cut across using the built-in JavaScript fetch() API, to using your own custom React hook, to using third party libraries such as Axios, which is used to make an HTTP request from Node.js or XMLHttpRequests right from the browser.
When we make a data request from our application to an API, we must set up a state to store the data when it returns. Like Redux, a state is kept in a context object or a state management tool. But in order to keep things straightforward, we will store the returned data in the local state of React using useState React hook.
The next step is to provide a state to manage the loading phase of your application in order to enhance the user experience and a second state to manage the error in the event that something goes wrong
With that said, we therefore will have the following states:
1 2 3 | const [data, setData] = useState(null);const [loading, setLoading] = useState(true);const [error, setError] = useState(null); |
Where Should you use the Fetch Method in React Application?
In your React application, you should always make your fetch request in the componentDidMount lifecycle method in a class component or using the useEffect hook in a functional component.
This is due to the fact that when we fetch data from the backend, we perform an operation known as a side effect, which can result in a variety of outcomes for the same data fetching. The identical request can, for instance, return a success or an error. In React, we should avoid performing side effects directly within the component body to avoid inconsistencies.
In this case, we will fetch our data in the Hook like so:
1 2 3 4 5 6 7 8 9 10 11 12 13 14 15 16 17 18 19 20 21 | componentDidMount() { fetch(`https://api.github.com/users/eunit99/repos`) .then(res => res.json()) .then( (result) => { this.setState({ isLoaded: true, items: result.items }); }, // Note: it's important to handle errors here // instead of a catch() block so that we don't swallow // exceptions from actual bugs in components. (error) => { this.setState({ isLoaded: true, error }); } )} |
1 2 3 4 5 6 7 8 9 10 11 12 13 14 15 16 17 18 19 20 | // Note: the empty deps array [] means// this useEffect will run once// similar to componentDidMount()useEffect(() => { fetch(`https://api.github.com/users/eunit99/repos`) .then(res => res.json()) .then( (result) => { setIsLoaded(true); setItems(result); }, // Note: it's important to handle errors here // instead of a catch() block so that we don't swallow // exceptions from actual bugs in components. (error) => { setIsLoaded(true); setError(error); } )}, []) |
A sample API response may look like so:
1 2 3 4 5 6 7 8 9 10 11 12 13 14 15 16 17 18 19 20 21 22 23 24 25 26 27 28 29 30 31 32 33 34 35 36 37 38 39 40 41 42 43 44 45 46 47 48 49 50 51 52 53 54 55 56 57 58 59 60 61 62 63 64 65 66 67 68 69 70 71 72 73 74 75 76 77 78 79 80 81 82 83 84 85 86 87 88 89 90 91 92 93 94 95 96 97 98 99 | { "id": 350135946, "node_id": "MDEwOlJlcG9zaXRvcnkzNTAxMzU5NDY=", "name": "advance-loan", "full_name": "Eunit99/advance-loan", "private": false, "owner": { "login": "Eunit99", "id": 24845008, "node_id": "MDQ6VXNlcjI0ODQ1MDA4", "gravatar_id": "", "type": "User", "site_admin": false }, "description": null, "fork": false, "collaborators_url": "https://api.github.com/repos/Eunit99/advance-loan/collaborators{/collaborator}", "notifications_url": "https://api.github.com/repos/Eunit99/advance-loan/notifications{?since,all,participating}", "created_at": "2021-03-21T22:29:30Z", "updated_at": "2021-09-03T01:11:41Z", "pushed_at": "2021-04-17T07:58:20Z", "git_url": "git://github.com/Eunit99/advance-loan.git", "ssh_url": "git@github.com:Eunit99/advance-loan.git", "homepage": null, "size": 25511, "stargazers_count": 1, "watchers_count": 1, "language": "JavaScript", "has_issues": true, "has_projects": true, "has_downloads": true, "has_wiki": true, "has_pages": false, "forks_count": 0, "mirror_url": null, "archived": false, "disabled": false, "open_issues_count": 0, "license": null, "allow_forking": true, "is_template": false, "web_commit_signoff_required": false, "topics": [], "visibility": "public", "forks": 0, "open_issues": 0, "watchers": 1, "default_branch": "main"} |
The sample response above is from the GitHub REST API when I make a GET request to the following endpoint https://api.github.com/users/eunit99. It returns all the stored data about a user called eunit99. With this response, we can decide to render it whichever way we like in our React app.
Prerequisites to setup your CRA
Before you proceed with this tutorial, you must satisfy the following conditions:
- Node.js ≥v6 is installed on your local machine
- NPM is installed on your local machine
- You have an understanding of React.js
- You have an understanding of React hooks
In this guide, I shall walk you through how to fetch data from REST APIs in your React application using the following methodologies:
- Fetch API
- custom React hook (
useFetch) - Axios
- React Query Library
- Async/Await
I will walk you through setting your React application to implementing all of the methods outlined above.
Let us jump right in

How to use the Fetch API to fetch data in React
The fetch() API (Fetch API) is an in-built JavaScript method which provides a better interface for accessing and manipulating parts of the HTTP pipeline, such as requests and responses. Fetch API provides an easy to use way to fetch resources asynchronously across the network.
The Fetch API method can be basic as in the case below and making a request can really be simple to set up. However, The fetch() method always takes in a compulsory argument, which is the path or URL to the resource or API you want to fetch from and an optional parameter, like so:
fetch(url, options)
The options parameters allow you to specify the type of operation you want to carry out using HTTP methods like the GET method to request data from an endpoint, POST to send data to an endpoint, PUT to update data in an endpoint, or even DELETE to remove data from an endpoint.
A basic fetch request may look like so:
1 2 3 | .then(response => response.json()) .then(data => console.log(data)); |
How to use the fetch() method in React to fetch data from API
In this section, I shall walk you through how to use the fetch() method in your React app using React functional component. To get started, set up your React application using the below commands:
mkdir dev && cd dev && npx create-react-app rest-apis-tutorial && cd rest-apis-tutorial && npm start
What the commands above do are:
- Creates a new directory called
dev - Change directory into
dev - Create a new React app called
rest-apis-tutorialusing the CRA command - Change directory into
rest-apis-tutorial - Start your React app using
npm start
You should get the following in your terminal upon completion of the commands above:
1 2 3 4 5 6 7 8 9 10 11 | Compiled successfully!You can now view rest-apis-tutorial in the browser. Local: http://localhost:3000 On Your Network: http://192.168.137.1:3000Note that the development build is not optimized.To create a production build, use npm run build.webpack compiled successfully |
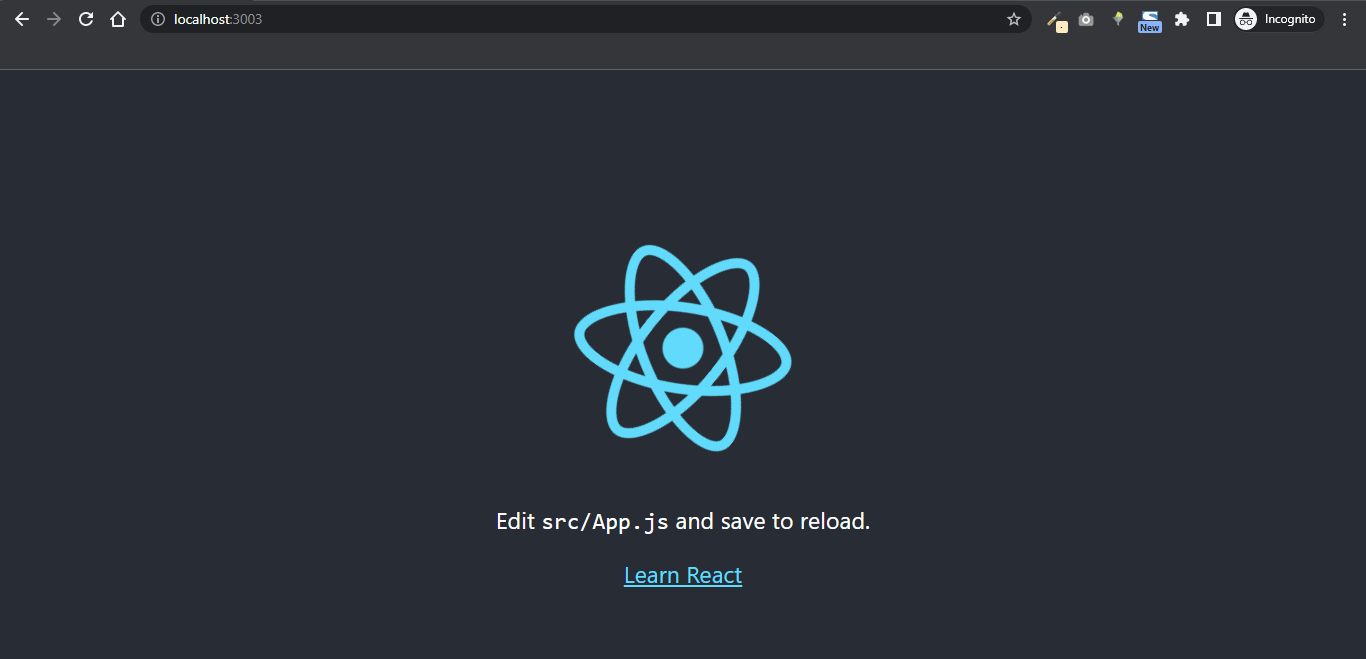
Your React app will then start hot reloading your development environment and your app should be running on localhost:3000 by default.

NOTE: We will make use of this app rest-apis-tutorial throughout this tutorial.
Using the fetch method to fetch from an API
In your App.js file, paste the following code:
1 2 3 4 5 6 7 8 9 10 11 12 13 14 15 16 17 18 19 20 21 22 23 24 25 26 27 28 29 30 | import { useState, useEffect } from "react";export default function App() { const [data, setData] = useState(null); const [loading, setLoading] = useState(true); const [error, setError] = useState(null); useEffect(() => { fetch(`https://api.github.com/users/eunit99/repos`) .then(response => response.json()) .then((usefulData) => { console.log(usefulData); setLoading(false); setData(usefulData); }) .catch((e) => { console.error(`An error occurred: ${e}`) }); }, []); return ( <> <div className="App"> {loading && <p>Loading...</p>} {!loading && <p>Fetched data</p>} </div> </> )} |
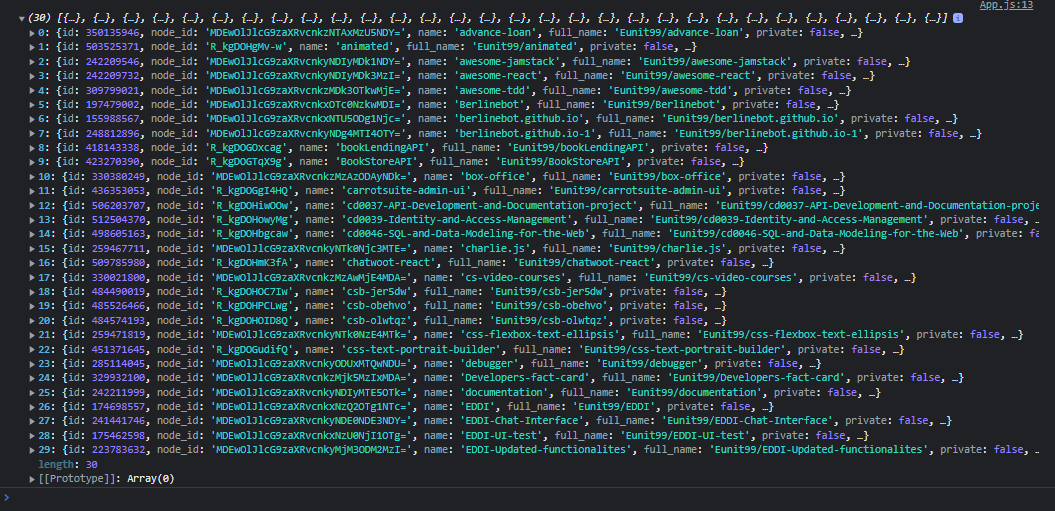
In your console, you should have a response similar to this as a JSON response, which shows a list of repositories using from the endpoint https://api.github.com/users/eunit99/repos.


You might be wondering what each piece of code is doing?
In the code above, you used the fetch() method to request data from the resource endpoint (https://api.github.com/users/eunit99/repos) as seen inside the useEffect Hook. This operation returns a promise that could either resolve or reject. If it resolves, you handle the response using .then() block. However, it is important to note that at this stage, the returned data is a Response object, which is not the actual format that we need, although it is useful to check for the HTTP status and to handle errors. If the request fails, we use the .catch blog to handle the exception.
How to use custom React hook (useFetch) to fetch data
Since the introduction of hooks in React 16.8, you have the ability to use state and other React features without writing a class. In addition to this, React hook paved the way for developers like you to write their own custom hooks; thereby reducing repetition, spaghetti code, and helping you keep to software development best practices such as the DRY principle.
You may find that writing the useEffect hook and all of its boilerplate within each component where you want to fetch data becomes tiresome and time-consuming over time.
You can utilize a custom hook as a specific abstraction, which you can develop yourself from a third-party library, to reduce the amount of code you reuse (like you will be walked through, using the library react-fetch-hook).
Finally, you can greatly reduce the size of your components by using a custom hook to create your HTTP request. All you need to do is call the hook at the component’s top.
Steps to use the react-fetch-hook library
- Install the library in your React application:npm i react-fetch-hook
- Import the
useFetchhook at the top inApp.jslike so:import useFetch from “react-fetch-hook”;
Using the custom React hook (useFetch) to fetch data from API
In your App.js file, paste the following code:
1 2 3 4 5 6 7 8 9 10 11 12 13 14 15 16 17 18 19 20 21 22 23 24 25 26 27 28 29 30 | import useFetch from "react-fetch-hook";export default function App() { if (error) { return ( <div> <p>Code: ${error.status}</p> <p>Message: ${error.statusText}</p> </div> ) } if (!isLoading) { console.log(data); } return ( <> <div className="App"> {isLoading && <p>Loading...</p>} {!isLoading && <p>Fetched data</p>} </div> </> )} |
In your console, you should have a response similar to this as a JSON response, which shows a list of repositories using from the endpoint https://api.github.com/users/eunit99/repos.

How to use Axios to fetch data from API
Another approach to making requests with React is to use the library Axios which is a promise-based HTTP client for the browser and Node.js. Since Axios is promise-based, you benefit from async and await for asynchronous code that is easier to read. You can intercept and cancel requests using Axios, and it also contains a built-in function that offers client-side security against cross-site request forgery.
We will simply update our Fetch implementation in this example by first installing Axios using npm:
Steps to use use Axios to fetch data from API
- Install the library in your React application: with either
YarnorNPM:npm install axiosoryarn add axios - Import the
axioslibrary at the top inApp.jslike so:import axios from “axios”;
What axios enables us to do is to use the exact same promise syntax as fetch – but instead of using our first then callback to manually determine whether the response is okay and throw an error, axios takes care of that for us.
1 2 3 4 5 6 7 8 9 10 11 12 13 14 15 16 17 18 19 20 21 22 23 24 25 26 27 28 29 30 31 32 33 34 35 36 37 | import { useState, useEffect } from "react";import axios from "axios";export default function App() { const [data, setData] = useState(null); const [loading, setLoading] = useState(true); const [error, setError] = useState(null); useEffect(() => { const getData = async () => { try { const response = await axios.get( `https://api.github.com/users/eunit99/repos` ); setData(response.data); setError(null); console.log(data); } catch (err) { setError(err.message); setData(null); } finally { setLoading(false); } }; getData(); }, [loading]); return ( <> <div className="App"> {loading && <p>Loading...</p>} {!loading && <p>Fetched data</p>} </div> </> )} |
In your console, you should have a response similar to this as a JSON response, which shows a list of repositories using from the endpoint https://api.github.com/users/eunit99/repos.

How to use the React Query to fetch data from API
We can accomplish a lot more with the React Query module than merely get data. By eliminating errors and making our program feel faster, it offers support for caching and refetching, which has an impact on the entire user experience.
React Query offers a custom Hook that we can reuse to fetch data throughout our app, similar to the first approach. Install the library before before using it:
Steps to use React Query to fetch data from API
- Install the library in your React application:npm i react-query
- Import the React Query library at the top in
index.jslike so:
1 2 3 | import { QueryClient, QueryClientProvider } from "react-query";const queryClient = new QueryClient(); |
- The client instance must then be passed to the
QueryClientProviderwe imported fromreact-queryto wrap our parent component. Consequently, yourindex.jsshould look like so:
1 2 3 4 5 6 7 8 9 10 11 12 13 14 15 16 | import React from 'react';import ReactDOM from 'react-dom/client';import './index.css';import App from './App';import { QueryClient, QueryClientProvider } from "react-query";const queryClient = new QueryClient();const root = ReactDOM.createRoot(document.getElementById('root'));root.render( <QueryClientProvider client={queryClient}> <App /> </QueryClientProvider>); |
- The next step is to fetch data using the
useQueryHook method fromreact-query, passing a distinct query key and the function that the query uses to do so:
1 2 3 4 5 6 7 8 9 10 11 12 13 14 15 16 17 | import axios from "axios";import { useQuery } from "react-query";export default function App() { const { isLoading, error, data } = useQuery("posts", () => axios(`https://api.github.com/users/eunit99/repos`) ); console.log(data); return ( <> <div className="App"> {isLoading && <p>Loading...</p>} {!isLoading && <p>Fetched data</p>} </div> </> );} |
In your console, you should have a response similar to this as a JSON response, which shows a list of repositories using from the endpoint https://api.github.com/users/eunit99/repos.


Conclusion
Almost all of the information you require about data fetching methods is covered in this tutorial. You were walked through how to retrieve data from a REST API.
You were also shown how to control various states, such as the loading and error stages. Now, you should now feel more at ease pulling data into your React application.
Try to spread this guide on the internet if you find it interesting.

Thinking of learning more? Find below some link to further tutorials:

Videos on Fetching Data from API and Examples


Further readings
- REST API Structure
- Fetch API by Mozilla Developer Network
- React UseRef: Create Scalable Apps That Perform Like a Dream
- React Best Practices 2021 – Featuring 20+ Experts
- How to use the React useState Hook
- Why and How to Use React useState Hook
You can build UI faster than your competition with CopyCat. Just copy production-ready code generated directly from Figma designs using AI. As a result, you can focus on building interactions, animations, networking and everything else that will make you stand out. You can be an exceptional front end or react developer who develops UI quickly using CopyCat.
We know what it’s like to do redundant work. Our goal is to help you avoid development rework that leads to delivery delays. Let us help you find efficient ways to write quality code.
You’ll be 2X faster at developing UI. You’ll meet your deadlines and spend your time solving exciting challenges, too! Best of all, you’ll eliminate sprint delays and design inconsistencies.


