- Introduction
- What is Virtualization?
- What is React window?
- What are the React-window React components?
- Getting started with Basic React Project Setup
- Creating and Rendering a large list without Virtualization
- [Demo] How to virtualize a large list using React Window?
- [Demo] How to virtualize a grid using React Window?
- [Demo] How to implement scrolling indicators
- Additional Features
- What are the alternatives for React window?
- Wrapping Up
- Easily Convert Figma Design to Code
Introduction
Rendering a large list of data is a common feature that you might want to implement in your web application. From achieving infinite scrolls in social media feeds to product listings on e-commerce websites, the use cases are many.
However, rendering large lists containing thousands of items in the UI can be a DOM-expensive task. It often leads to the over-allocation of DOM nodes and hence, creates performance bottlenecks. So what is the right way to do it?
In this article, let’s talk about virtualization and how to efficiently render large list structures in your React app using the popular react-window library.

What is Virtualization?
Virtualization (or Windowing) is a technique that helps us render large amounts of data by keeping track of the user’s scrolling position and displaying only the DOM contents that are visually relevant at that current scroll position. It aids us in displaying data in grid format or list format.
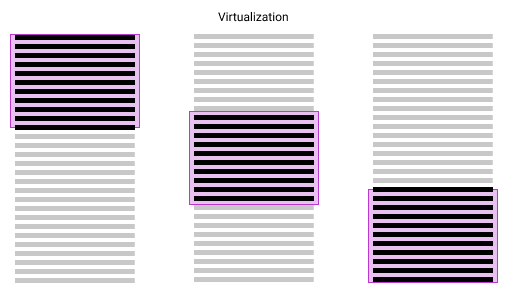
How does Virtualization work?
A simple implementation of a virtualized list will need us to pre-calculate the total height of our list by multiplying the dimension of the list item with the total count of the list items. We then position the list items to create a list on which the user can perform the scroll. It provides a UX similar to an infinite scroll but adds and removes the data from the long list incrementally just as the data enters the visible viewport without affecting the other items.
However, we do not need to go through all these steps since we will be using react-window to achieve virtualization in this tutorial.
Why do we need Virtualization?
The key reason why we need to consider virtualization while rendering large lists is simply that a large DOM size is problematic. If you have ever used Google Lighthouse or PageSpeed Insights, you’ve probably come across the warning “Avoid an excessive DOM size“. The Lighthouse’s DOM size audit fails if a page has:
- More than 1,500 total nodes.
- Reached a DOM depth of greater than 32 nodes.
- Greater than 60 child nodes belonging to a parent node.

An excessive DOM size can impact your page performance in the following ways:
- Network efficiency and load performance
- Runtime performance
- Memory performance
To know more on this topic, check out the following articles.
In order to optimize the DOM size of your React application, and render large tree structures while minimizing the number of nodes created, one recommended solution is to implement virtualization with the help of a windowing library like react-window.
What are the alternatives for Virtualization?
Apart from virtualization, there are a few other ways to display a large list of data. The most common alternative options are:
- Pagination
- Infinite Scrolling
- Load More

For a detailed pro & con comparison between Pagination, Infinite Scrolling, and Load More and to figure out when to use which, check out this blog post – Pagination vs. Infinite Scroll vs. Load More Explained.
Virtualization essentially provides us with all the benefits of pagination along with the UX of infinite scrolling.
What is React window?
The react-window is a windowing (virtualization) library that provides React components for efficiently rendering large lists and tabular data. The react-window work by rendering only a part of a large data set, just enough to fill the viewport.

According to the official docs, the library helps us to address the following common performance bottlenecks:
- It reduces the amount of work (and time) required to render the initial view and to process updates.
- It reduces the memory footprint by avoiding the over-allocation of DOM nodes.
The react-window is a complete rewrite of the react-virtualized library, both authored by Brian Vaughn, who is also a member of the React core team. The author says that react-window is lighter, faster, and beginner-friendly compared to react-virtualized which has, apparently, more features. Windowing wars: React-virtualized vs. React-window is a well-explained article that compares the 2 windowing libraries and helps you decide which is right for your project.
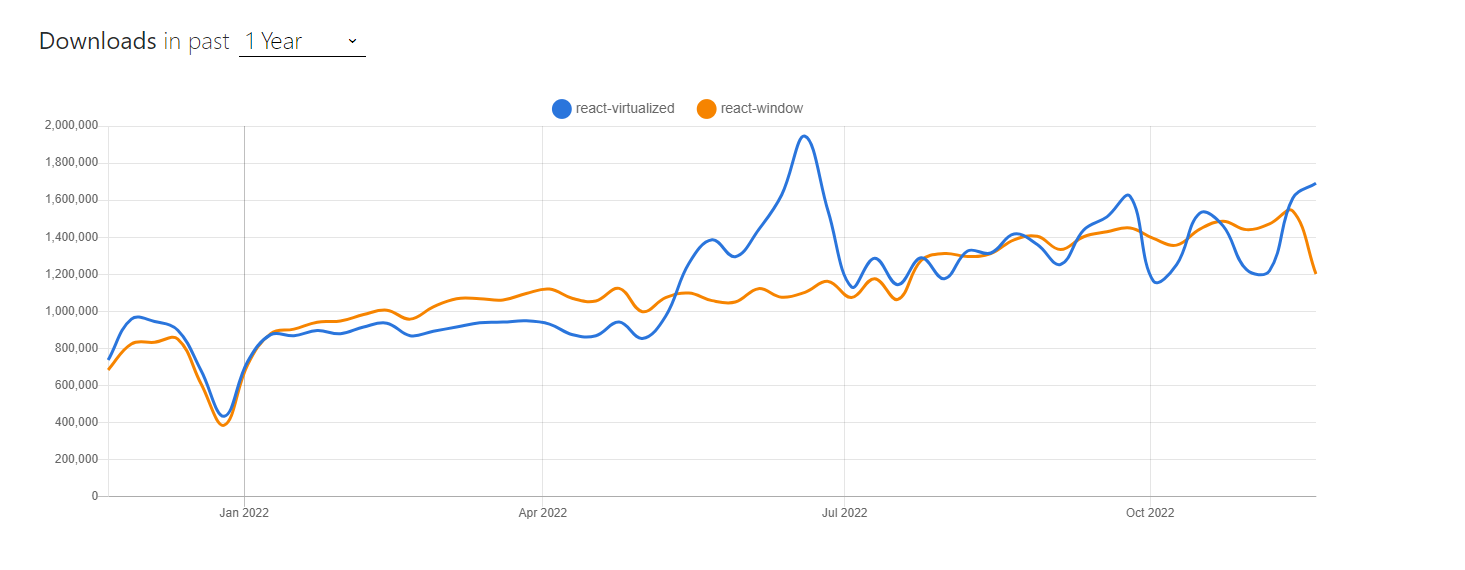
Do you know that react-window has over 1,527,307 weekly NPM downloads and 13.4k+ Github stars?
The below graph shows the NPM download trend comparison between react window and react virtualized.
What are the React-window React components?
As mentioned, React window helps us to display data in list and grid format. For this, it out-of-the-box provides us with four components:
In the upcoming sections, we will learn how to utilize these components to achieve virtualization through working demos.
Getting started with Basic React Project Setup
Step 1: Let us start with the basic React project setup using CRA.
1 | npx create-react-app react-window-demo |
Step 2: Navigate to the project folder once the app is created successfully. Then…
1 | cd react-window-demo |
Step 3: Install the dependencies. We will use the faker library to generate the large list of data.
1 | yarn add react-window @faker-js/faker |
Step 4: Run the application.
1 | yarn start |
The app starts running and is served at http://localhost:3000/.
Creating and Rendering a large list without Virtualization
Now that our React app is running, next, let us create a large list and render it. The steps are as below.
Step 1: Inside the App.js file, let us generate a large list of dummy user data using the faker library and initialize our data state by the useStatehook lazy loading.
In this code, I am creating an array with a length of 1000.
1 2 3 4 5 6 7 8 9 10 11 12 13 14 15 16 17 18 19 20 21 22 23 24 25 26 27 28 | //App.jsimport React, { useState } from "react";import { faker } from "@faker-js/faker";import "./App.css";function App() { const createUser = () => { return { name: faker.name.fullName(), email: faker.internet.email(), address: faker.address.streetAddress(), bio: faker.lorem.sentence(), image: faker.image.avatar(), }; }; const [data, setData] = useState(() => Array.from({ length: 1000 }, createUser) ); return ( ... );}export default App; |
Step 2: Now we need to render the list. Inside src/components let us create two components named List and ListItems.
1 2 3 4 5 6 7 8 9 10 11 12 13 14 15 16 | //List.jsimport React from "react";import ListItem from "./ListItem";const List = ({ userData }) => { return ( <ul className="list-container"> {userData.map((user) => { return <ListItem user={user} />; })} </ul> );};export default List; |
The List component accepts an array of userData as a prop. It then iterates through it and renders a list by passing each array item to the ListItem component as a prop.
1 2 3 4 5 6 7 8 9 10 11 12 13 14 15 16 17 18 19 20 21 22 23 24 25 26 27 28 29 30 31 | //ListItem.jsimport React from "react";const ListItem = ({ user }) => { return ( <li className="user-container"> <img src={user.image} alt={`avatar of ${user.name}`} className="user-image" /> <div> <div className="user-name">{user.name}</div> <div> <b>Address: </b> {user.address} </div> <div> <b>Email: </b> {user.email} </div> <div> <b>Bio: </b> {user.bio} </div> </div> </li> );};export default ListItem; |
Step 3: Inside the App.js let us render the List component.
1 | <List userData={data} /> |
Our final code for App.js looks like this.
1 2 3 4 5 6 7 8 9 10 11 12 13 14 15 16 17 18 19 20 21 22 23 24 25 26 27 28 29 30 | import React, { useState } from "react";import { faker } from "@faker-js/faker";import List from "./components/List";import "./App.css";function App() { const createUser = () => { return { name: faker.name.fullName(), email: faker.internet.email(), address: faker.address.streetAddress(), bio: faker.lorem.sentence(), image: faker.image.avatar(), }; }; const [data, setData] = useState(() => Array.from({ length: 1000 }, createUser) ); return ( <div className="App"> <h1>Rendering a large list without Virtualization</h1> <List userData={data} /> </div> );}export default App; |
Step 4: Replace the CSS style inside App.css with the below.
1 2 3 4 5 6 7 8 9 10 11 12 13 14 15 16 17 18 19 20 21 22 23 24 25 26 27 28 29 30 31 32 33 34 35 36 37 38 39 40 41 42 43 44 45 46 47 48 49 50 51 52 53 54 55 56 57 58 59 60 61 62 63 64 65 66 67 | * { font-family: 'Poppins', sans-serif;}html { background: #17202A; display: flex; justify-content: center; overflow: scroll;}h1{ font-size: 48px; color: #FDFEFE; display: flex; justify-content: center;}ul li:nth-child(even) {background: palegoldenrod;}.list-container{ height: 800px; background-color: #F8F9F9; overflow-y: scroll; margin-bottom: 50px;}.user-container { display: flex; align-items: center; gap: 20px;}.user-name { font-size: 24px; font-weight: bold;}.user-image { border-radius: 100%; height: 150px; width: 150px;}.skeleton-container{ display: flex; align-items: center; width: 100%; height: 100%; gap: 20px;}.skeleton-user-image { border-radius: 100%; height: 150px; width:150px; background-color: rgba(222, 213, 213, 0.756);}.skeleton-user-info{ background-color: rgba(222, 213, 213, 0.756); height: 150px; width: 80%;} |
Step 5: Run the code. Our app looks as below.
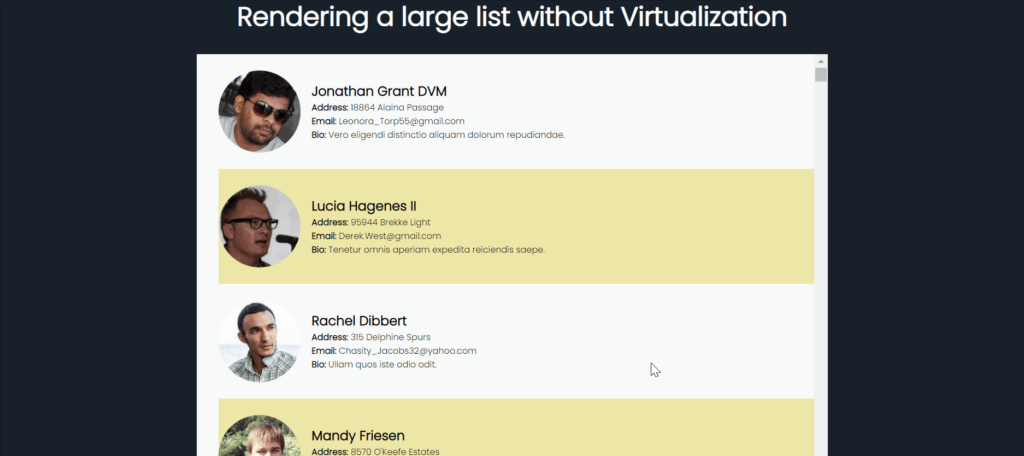
Now, if we observe the DOM, we can see that all the 1000 list items are rendered in the DOM on the initial load itself, creating large tree structures.
[Demo] How to virtualize a large list using React Window?
In this section, let us learn how to implement virtualization on a list using react-window step by step. We will be covering two scenarios:
- Fixed-size list
- Variable size list
How to virtualize a fixed-size list?
If you want to render a long one-dimensional list of equally sized items, you can make use of the FixedSizeList component provided by React window.
1 2 3 4 5 6 7 | <FixedSizeList {...props}> {({ index, style }) => ( <div style={style}> ... </div> )}</FixedSizeList> |
A function that renders the rows is passed as a child to FixedSizeList. The children component exposes a few props:
- index – responsible for rendering individual items of the list
- style – used for positioning
A few mandatory props that you need to pass to the FixedSizeList are:
- height – to define the height of the list
- width – to define the width of the list
- itemCount – to define the total number of items in the list
- itemSize – to define the size of an item in the direction being windowed
Check out the docs here to get the complete list of all props and methods supported by the FixedSizeList component.
Now, let us move on to the implementation. I will be demonstrating how to achieve virtualization on the list that we created in the previous section.
Step 1: Create a new component called FixedSizeList.js (any name can be given).
Inside this component, we will import the FixedSizeList component of React window and pass all the props and define the children component using ListItem.
1 2 3 4 5 6 7 8 9 10 11 12 13 14 15 16 17 18 19 20 21 22 23 24 25 | //FixedSizeList.jsimport React from "react";import { FixedSizeList as List } from "react-window";import ListItem from "./ListItem";const FixedSizeList = ({ userData }) => { return ( <List itemData={userData} itemCount={userData.length} itemSize={200} height={800} width={1000} innerElementType="ul" className="list-container" > {({ index, data, style }) => { return <ListItem user={data[index]} style={style} />; }} </List> );};export default FixedSizeList; |
Code Explanation:
- We have passed our data explicitly using the itemData prop which is exposed to the children component as data.
- The total number of items is set by passing the data array length to itemCount.
- We have defined the innerElementType as “ul” for accessibility reasons.
- The className is defined to reflect the CSS style.
Also, update the ListItem component to receive the style parameter as shown below:
1 2 3 4 5 6 7 8 9 10 11 12 13 | //ListItem.jsimport React from "react";const ListItem = ({ user, style }) => { return ( <li className="user-container" style={style}> ... </li> );};export default ListItem; |
Step 2: In , let us call our FixedSizeList component to render the list.
1 | <FixedSizeList userData={data} /> |
Our final code for App.js looks like this.
1 2 3 4 5 6 7 8 9 10 11 12 13 14 15 16 17 18 19 20 21 22 23 24 25 26 27 28 29 30 | import React, { useState } from "react";import { faker } from "@faker-js/faker";import FixedSizeList from "./components/FixedSizeList";import "./App.css";function App() { const createUser = () => { return { name: faker.name.fullName(), email: faker.internet.email(), address: faker.address.streetAddress(), bio: faker.lorem.sentence(), image: faker.image.avatar(), }; }; const [data, setData] = useState(() => Array.from({ length: 1000 }, createUser) ); return ( <div className="App"> <h1>Rendering a fixed-size list with Virtualization</h1> <FixedSizeList userData={data} /> </div> );}export default App; |
Step 3: Run the code. Our app looks as below.
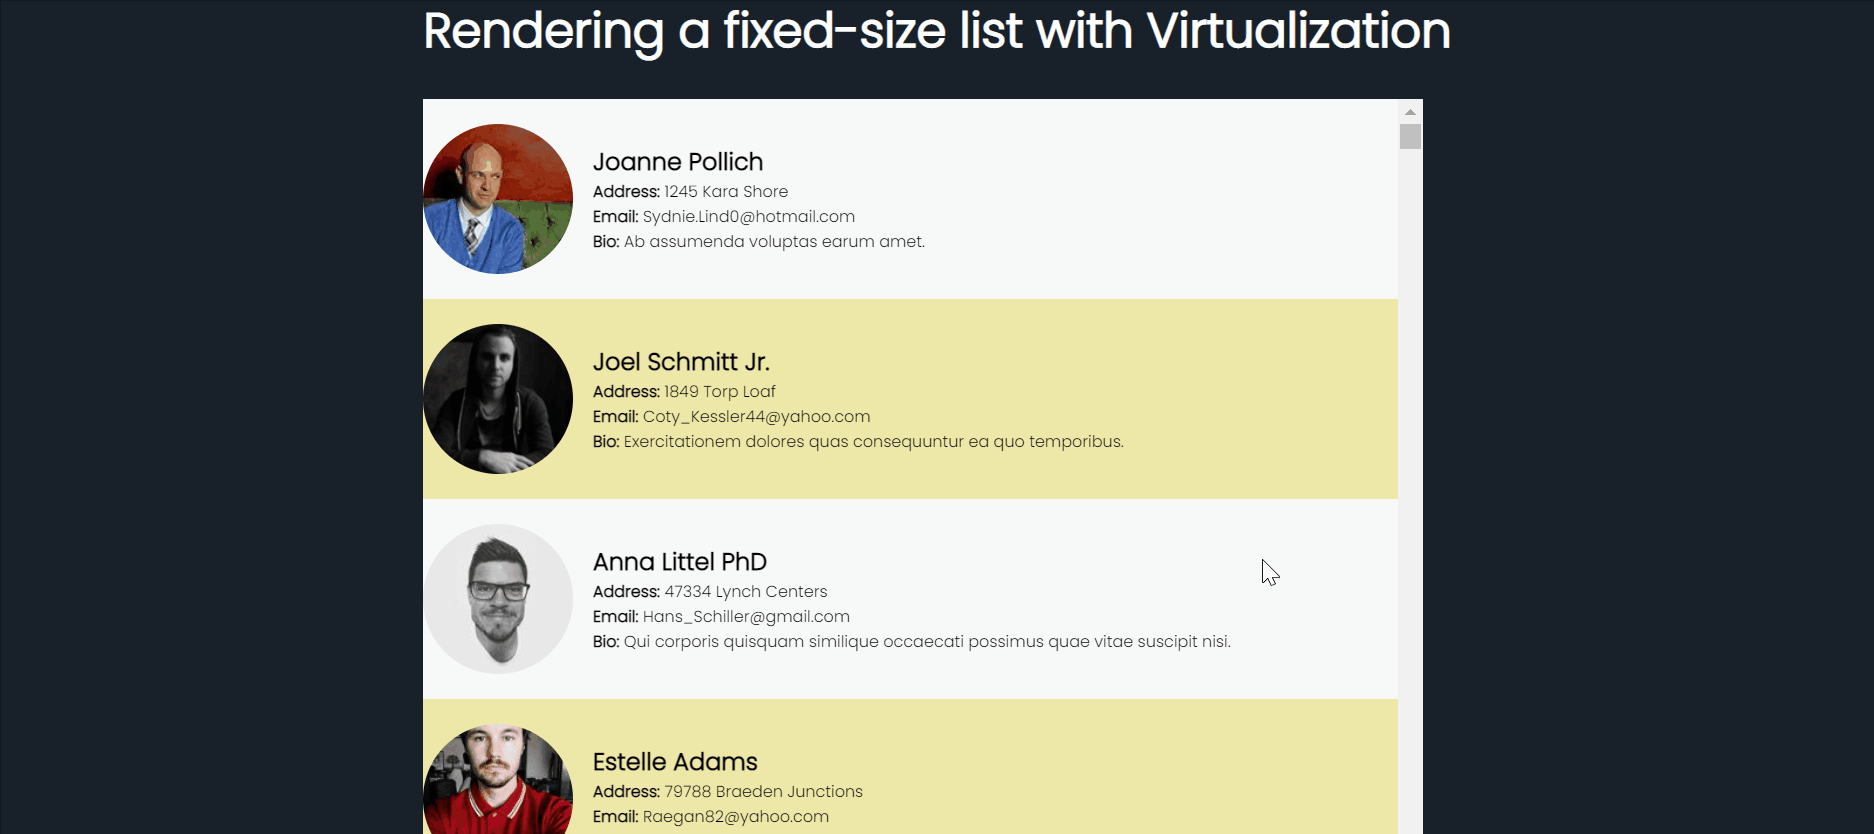
Now let us observe the DOM again. We can see that only a few items are loaded in the DOM and as we scroll, the items are updated.
We have successfully implemented virtualization on a Fixed sized list!
How to virtualize a variable size list?
If you want to render a list of items having different sizes, you can make use of the VariableSizeList component provided by React window. The VariableSizeList component works in the same way as FixedSizeList but with the following additions in props.
- estimatedItemSize: to define the estimated size of an item in the direction being windowed.
Also here, itemSize is expected to be a function instead of a specific value. For eg:
1 2 3 | function itemSize(index) { return index % 2 ? 50 : 25;} |
Check out the docs here to get the complete list of all props and methods supported by the VariableSizeList component.
Let’s move on to implementation now.
Step 1: Create a new component called VariableSizeList.js (any name can be given).
Inside this component, we will import the VariableSizeList component of React window and pass all the props and define the children component using ListItem as we did in the previous example.
For this demo, to generate the rows having variable heights, I am writing an arbitrary function called itemSize which will assign a row height value of 50px to all even rows and 25px to all odd rows. Note that, your row heights/column widths (for vertical and horizontal layouts respectively) should be based on your actual content.
Finally, I am assigning the itemSize prop of the List with the itemSize function.
1 2 3 4 5 6 7 8 9 10 11 12 13 14 15 16 17 18 19 20 21 22 23 24 25 26 27 28 29 30 | //VariableSizeList.jsimport React from "react";import { VariableSizeList as List } from "react-window";import ListItem from "./ListItem";const VariableSizeList = ({ userData }) => { // Your row heights/column widths should be based on the content of the row. function itemSize(index) { return index % 2 ? 200 : 400; } return ( <List itemData={userData} itemCount={userData.length} itemSize={itemSize} height={800} width={1000} innerElementType="ul" className="list-container" > {({ index, data, style }) => { return <ListItem user={data[index]} style={style} />; }} </List> );};export default VariableSizeList; |
Step 2: In App.js, now let us call our FixedSizeList component to render the list.
1 | <VariableSizeList userData={data} /> |
Our final code for App.js looks like this.
1 2 3 4 5 6 7 8 9 10 11 12 13 14 15 16 17 18 19 20 21 22 23 24 25 26 27 28 29 30 | import React, { useState } from "react";import { faker } from "@faker-js/faker";import VariableSizeList from "./components/VariableSizeList";import "./App.css";function App() { const createUser = () => { return { name: faker.name.fullName(), email: faker.internet.email(), address: faker.address.streetAddress(), bio: faker.lorem.sentence(), image: faker.image.avatar(), }; }; const [data, setData] = useState(() => Array.from({ length: 1000 }, createUser) ); return ( <div className="App"> <h1>Rendering a variable-size list with Virtualization</h1> <VariableSizeList userData={data} /> </div> );}export default App; |
Step 3: Run the code. Our app looks as below.
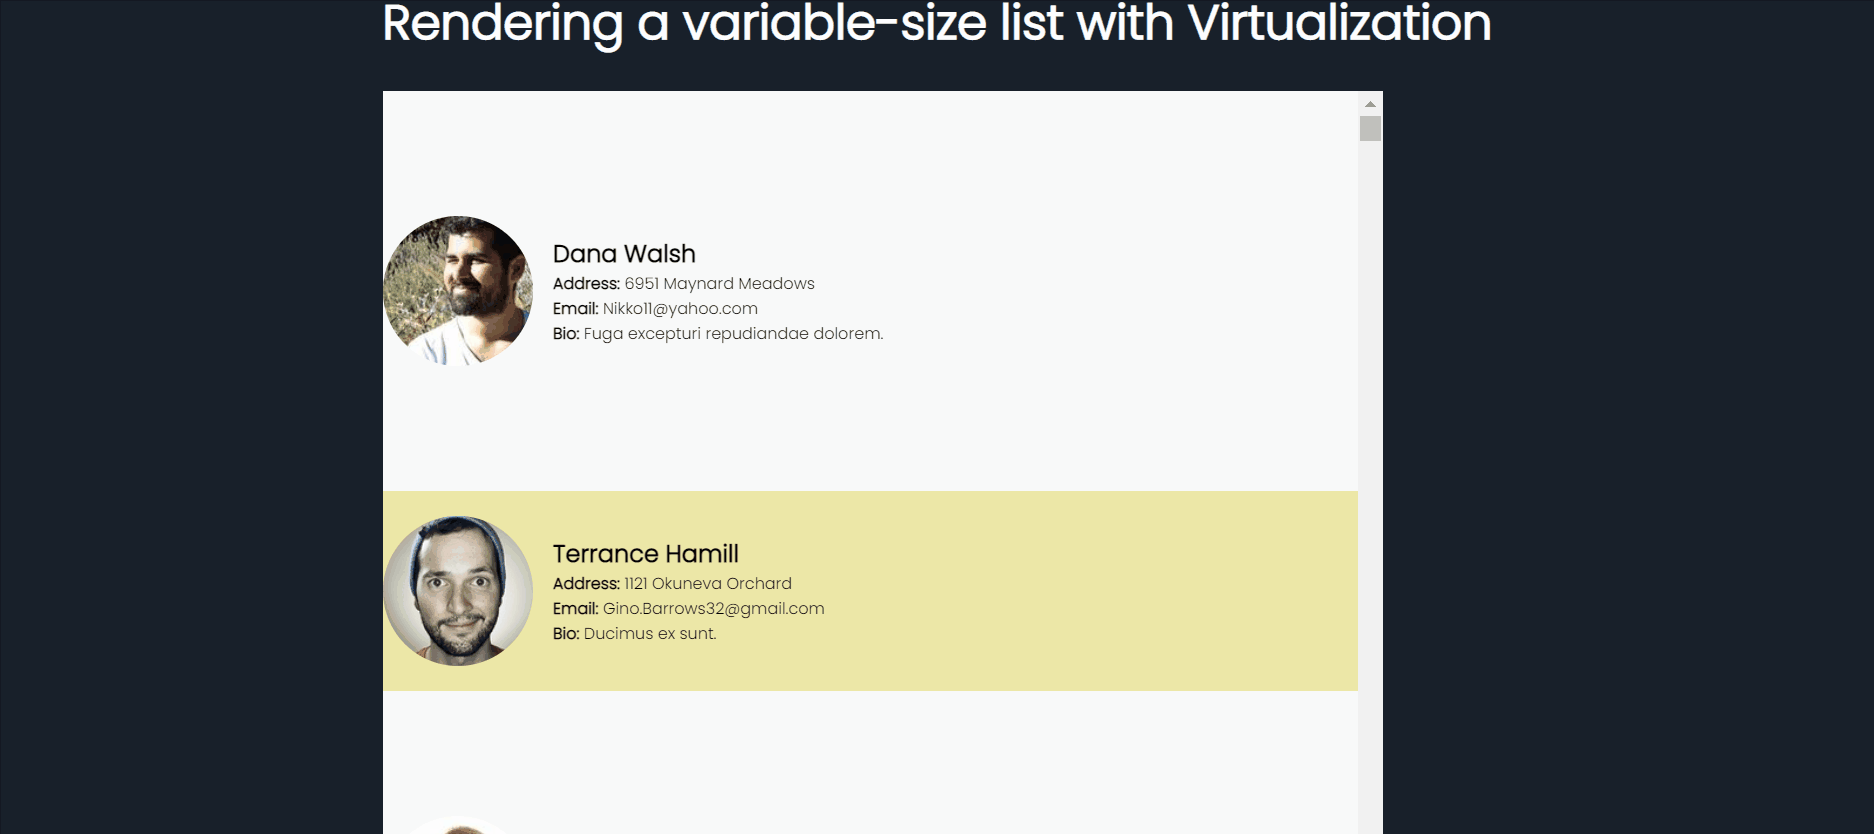
We have successfully implemented virtualization on a Variable sized list!
[Demo] How to virtualize a grid using React Window?
Using react-window we can also virtualize a multi-dimensional list or grid. Here, the visible content window changes as the user scroll vertically and horizontally.

In this section let us learn how to implement virtualization on a grid using react-window step by step. We will be covering two scenarios:
- Fixed sized grid
- Variable sized grid
How to virtualize a fixed-size grid?
If you want to render a large grid of equally sized items (or cells), you can make use of the FixedSizeGrid component provided by React window.
1 2 3 4 5 6 7 | <FixedSizeGrid {...props}> {({ columnIndex, rowIndex, style }) => ( <div style={style}> ... </div> )}</FixedSizeGrid> |
The FixedSizeGrid API is similar to FixedSizeList, but now you need to pass height, width, and item count for both rows and columns. Also, the children component exposes rowIndex and columnIndex props for rendering individual cells.
With that said, let us move on to the implementation.
Step 1: First of all, let us create a multi-dimensional array of user data for feeding our grid. I am modifying, my data state initialization in App.js as below.
1 2 3 | const [data, setData] = useState(() => Array.from({ length: 100 }, () => Array.from({ length: 10 }, createUser))); |
This code will create a multi-dimensional array of 100 rows and 10 columns.
Step 2: Now we need to render the grid. Inside src/components let us create two components named FixedSizeGrid and GridItem.
1 2 3 4 5 6 7 8 9 10 11 12 13 14 15 16 17 18 19 20 21 22 23 24 25 26 27 | //FixedSizeGrid.jsimport React from "react";import { FixedSizeGrid as Grid } from "react-window";import GridItem from "./GridItem";const FixedSizeGrid = ({ userData }) => { return ( <Grid height={1000} width={1500} itemData={userData} columnCount={10} columnWidth={500} rowCount={100} rowHeight={200} innerElementType="div" className="list-container" > {({ columnIndex, rowIndex, data, style }) => { return <GridItem user={data[rowIndex][columnIndex]} style={style} />; }} </Grid> );};export default FixedSizeGrid; |
1 2 3 4 5 6 7 8 9 10 11 12 13 14 15 16 17 18 19 20 21 22 23 24 25 26 27 28 29 30 31 | //GridItem.jsimport React from "react";const GridItem = ({ user, style }) => { return ( <div className="user-container" style={style}> <img src={user.image} alt={`avatar of ${user.name}`} className="user-image" /> <div> <div className="user-name">{user.name}</div> <div> <b>Address: </b> {user.address} </div> <div> <b>Email: </b> {user.email} </div> <div> <b>Bio: </b> {user.bio} </div> </div> </div> );};export default GridItem; |
Step 3: Inside the App.js let us import and render the grid component.
1 | <FixedSizeGrid userData={data} /> |
Our final code for App.js looks like this.
1 2 3 4 5 6 7 8 9 10 11 12 13 14 15 16 17 18 19 20 21 22 23 24 25 26 27 28 29 30 | import React, { useState } from "react";import { faker } from "@faker-js/faker";import FixedSizeGrid from "./components/FixedSizeGrid";import "./App.css";function App() { const createUser = () => { return { name: faker.name.fullName(), email: faker.internet.email(), address: faker.address.streetAddress(), bio: faker.lorem.sentence(), image: faker.image.avatar(), }; }; const [data, setData] = useState(() => Array.from({ length: 100 }, () => Array.from({ length: 10 }, createUser)) ); return ( <div className="App"> <h1>Rendering a fixed-size grid with Virtualization</h1> <FixedSizeGrid userData={data} /> </div> );}export default App; |
Step 4: Run the code. Our app looks as below.

We have successfully implemented virtualization on a Fixed sized Grid!
How to virtualize a variable-size grid?
Likewise, to virtualize a grid having varying cell sizes, you can make use of VariableSizeGrid component. The component has the same props as FixedSizeGrid, but, for changing column width and row height values, you will need to pass functions to their respective prop.
Let us move on to implementation.
Step 1: Create a new component called VariableSizeGrid.js (any name can be given).
Inside this component, we will import the VariableSizeGrid component of React window and pass all the props and define the children component using GridItem as we did in the previous example.
For this demo, to generate the rows and columns having variable width and height values respectively, I am writing two arbitrary functions called columnWidth and rowHeight and passing the values to props.Note that, your row heights/column widths should be based on your actual content.
1 2 3 4 5 6 7 8 9 10 11 12 13 14 15 16 17 18 19 20 21 22 23 24 25 26 27 28 29 30 31 32 33 | import React from "react";import { VariableSizeGrid as Grid } from "react-window";import GridItem from "./GridItem";const VariableSizeGrid = ({ userData }) => { function columnWidth(index) { return index % 2 ? 500 : 800; } function rowHeight(index) { return index % 2 ? 200 : 400; } return ( <Grid height={1000} width={1500} itemData={userData} columnCount={10} columnWidth={columnWidth} rowCount={100} rowHeight={rowHeight} innerElementType="div" className="list-container" > {({ columnIndex, rowIndex, data, style }) => { return <GridItem user={data[rowIndex][columnIndex]} style={style} />; }} </Grid> );};export default VariableSizeGrid; |
Step 2: In App.js, now let us call our VariableSizeGrid component to render the list.
1 | <VariableSizeGrid userData={data} /> |
Our final code for App.js looks like this.
1 2 3 4 5 6 7 8 9 10 11 12 13 14 15 16 17 18 19 20 21 22 23 24 25 26 27 28 29 30 | import React, { useState } from "react";import { faker } from "@faker-js/faker";import VariableSizeGrid from "./components/VariableSizeGrid";import "./App.css";function App() { const createUser = () => { return { name: faker.name.fullName(), email: faker.internet.email(), address: faker.address.streetAddress(), bio: faker.lorem.sentence(), image: faker.image.avatar(), }; }; const [data, setData] = useState(() => Array.from({ length: 100 }, () => Array.from({ length: 10 }, createUser)) ); return ( <div className="App"> <h1>Rendering a variable-size list with Virtualization</h1> <VariableSizeGrid userData={data} /> </div> );}export default App; |
Step 3: Run the code. Our app looks as below. I have added a border style to distinguish the cells.


We have successfully implemented virtualization on a Variable sized grid!
[Demo] How to implement scrolling indicators
As an additional performance optimization, while expensive elements are being loaded you might often want to show a simple UI like loaders or skeletons on scrolling. In this section, let us learn how to implement a scrolling indicator on a react virtualized list.
Step 1: Enable the useIsScrolling property for your react-window list component.
1 2 3 | <List useIsScrolling={true}{...props}> ...</List> |
Step 2: Now, expose the isScrolling prop (boolean value) to the children component. When the isScrolling value is true, render your loaders and when false, load your list items conditionally.
Our final code is as below.
1 2 3 4 5 6 7 8 9 10 11 12 13 14 15 16 17 18 19 20 21 22 23 24 25 26 27 28 29 30 31 32 33 | //ListWithScrollIndicators.jsimport React from "react";import { FixedSizeList as List } from "react-window";import ListItem from "./ListItem";const ListWithScrollIndicators = ({ userData }) => { return ( <List itemData={userData} itemCount={userData.length} itemSize={200} height={800} width={1000} innerElementType="ul" className="list-container" useIsScrolling={true} > {({ index, data, style, isScrolling }) => isScrolling ? ( <div className="skeleton-container" style={style}> <span className="skeleton-user-image"></span> <div className="skeleton-user-info"></div> </div> ) : ( <ListItem user={data[index]} style={style} /> ) } </List> );};export default ListWithScrollIndicators; |
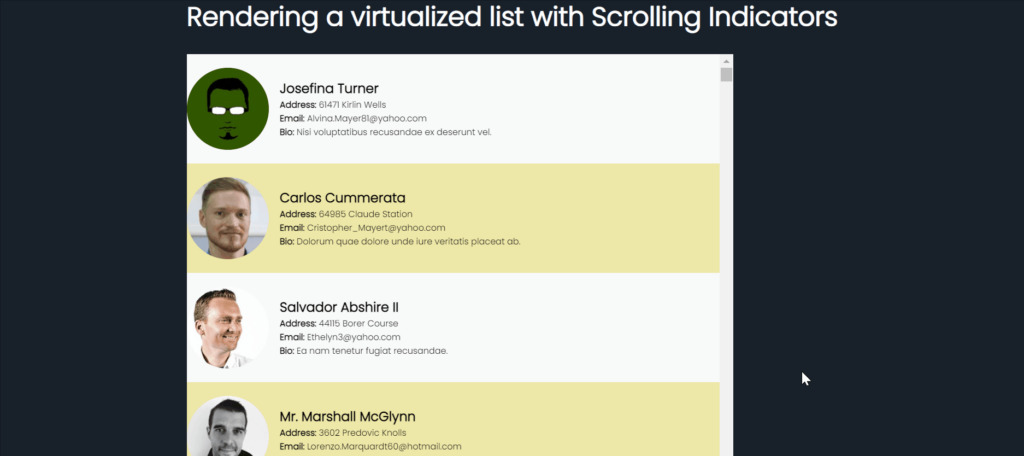
Step 3: Run the code. Our app looks as below on scrolling now.
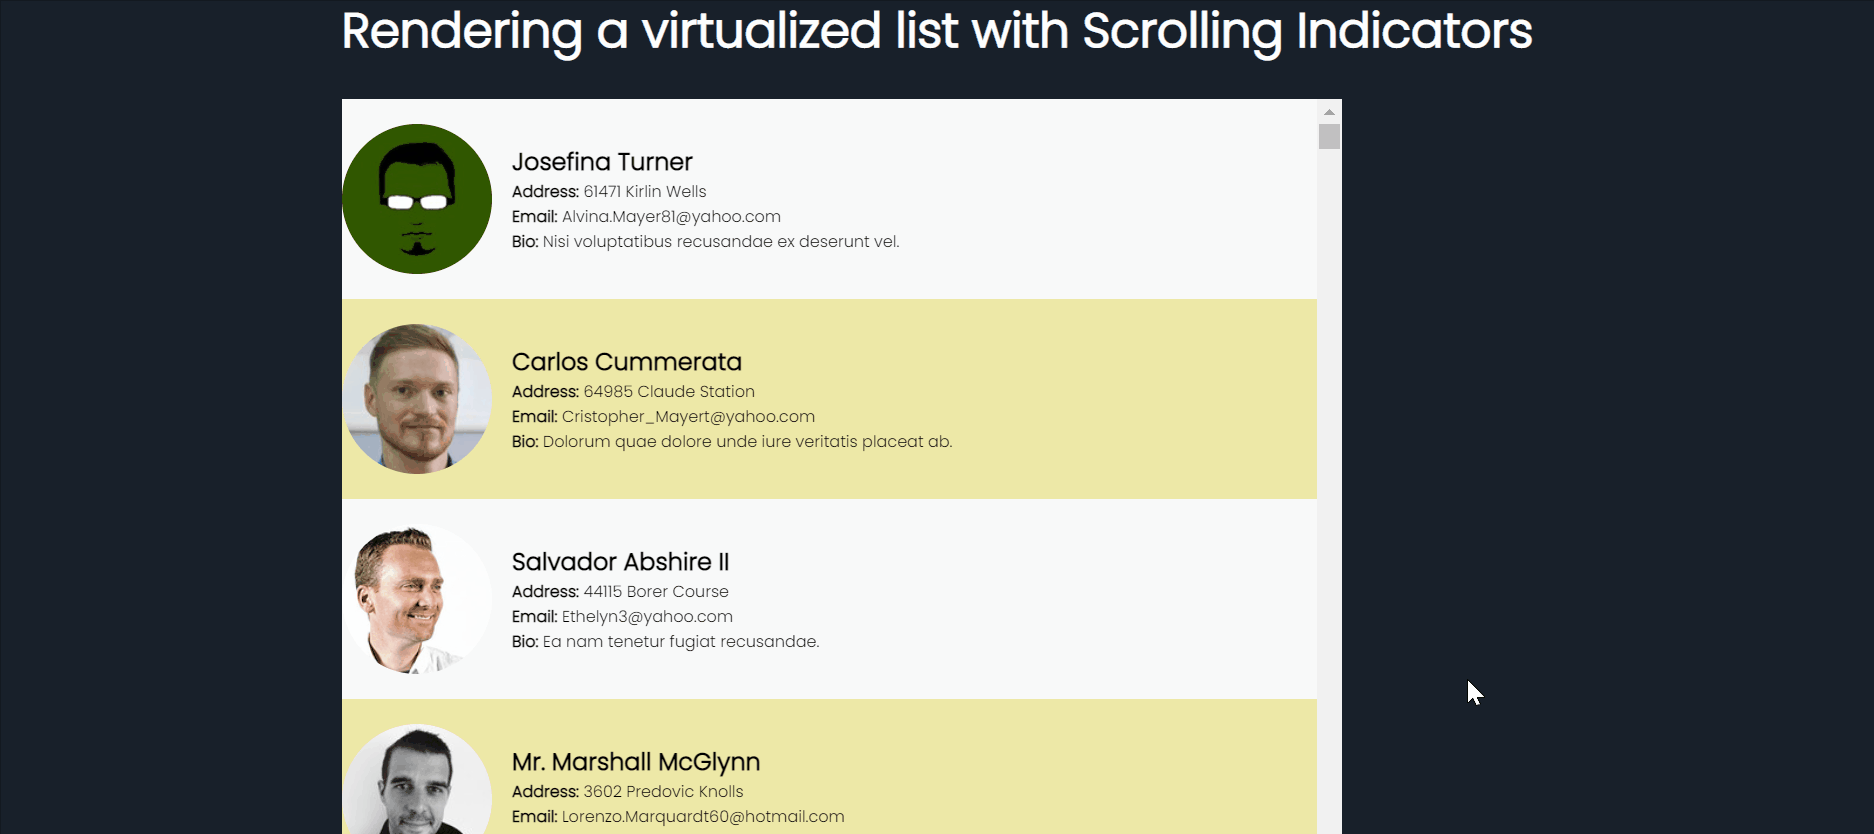
Additional Features
In this section, let us briefly touch upon other cool features supported by React window.
- Scrolling to an item – allows you to programmatically scroll to an item within the list.
- Memoized list items – allows you to avoid unnecessary re-renders using React.memo or shouldComponentUpdate
- Layouts and Directions – supports vertical and horizontal layouts and RTL and LTR directions.
- Overscanning– allows you to overscan items and define how many items of the visible window are to be rendered at all times.
- Infinite loading lists and Lazy load data on scroll – create infinite loading lists that can be just-in-time loaded as they are scrolled into view using react-window with react-window-infinite-loader package and lazy load data.
- Tree view solution – provides a lightweight and flexible solution to render large tree structures (eg: file system) using react-vtree.
- Autosizer – allows you to automatically adjust the width and height of a single child using react-virtualized-auto-sizer
What are the alternatives for React window?
A few other related libraries that can help you implement virtualization in your React app are:
For a quick comparison, you can check out the stats below.

Wrapping Up
Virtualization or Windowing helps address performance bottlenecks caused by DOM element over-allocation while rendering large lists in the UI. However, implementing it without any library support can be pretty painful.
React window is a popular windowing library used by React js developers for efficiently rendering large lists or grids. In this blog post, we learned react-window usage in various scenarios, and also we discussed additional features supported by the library. Hoping you found this tutorial helpful! All the source codes are available in this GitHub repo.
I also strongly recommend you check out the following resources to dive more deeply into the topic.
More Interesting Reads From Our Blogs
- How to Virtually Render Large Lists Using React Virtualized
- Reactjs Build Production: Optimize Performance with a Deployment Build
- Optimize React Performance with React Memo and Save $$$ by Caching
Easily Convert Figma Design to Code
Do you want to be 2x faster in developing your UI code?
The good news is you can easily convert your Figma design into production-friendly React code in no time! Check out CopyCat, an AI-powered plugin that will empower you by converting your Figma design to UI code. Copycat also provides seamless support to leading UI frameworks including Bootstrap, Tailwind CSS, and Material UI. Start building world-class UI in half the time using Copycat now!


